Ketubah Activity
Objective: Learn how to create a paper cut artwork!
Materials Needed:
- 8" X 8" white paper (copier style )
- 8.5" X 8.5" colored paper for backing
- Colored Pencils
- Scissors
- White Glue
Introduction:
- Paper originated almost 2000 years ago in China. The art of cutting paper into designs and pictures started soon afterwards.
- Many cultures around the world have paper cutting traditions. Chinese, Polish, and Mexican paper cuts are well known.
- In the small shtetles (villages) of Europe, especially in Poland and Germany, young Jewish boys learned how to cut paper designs. these Jewish paper cuts were used to decorate doors and windows of their homes for the holiday, Shavuot.
Procedure:
-
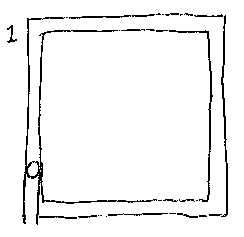 Using the 8” square, place your pointer finger inside the edge of the paper, just touching it, and with one color, draw a mark on the other side of your finger. This is your measure for the line you make around all four sides, your frame.
 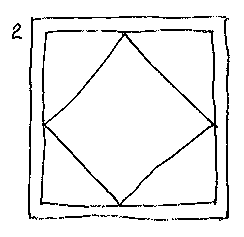 Change to another color pencil. Draw a large shape so that it touches all four sides of the frame. (Suggestions: diamond, circle, star, Star of David)
 Using the same color, draw an object inside the shape that touches the shape in four places or more.
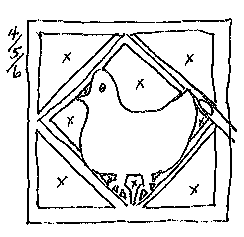 Now get your first color. Put your finger on the line of the shape. Draw a line on each side of your finger. You want to frame in each line.
 - Trace your object stopping at the frame lines of your shape.
- Write and “X” in each space inside your frame lines.
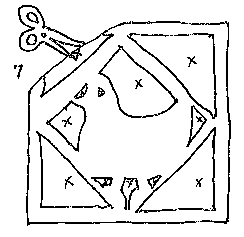 Fold the paper on each “X” and make a snip with your scissors.
- Put your scissors into each hole and cut the paper out to the frame’s line.
- Put a thin line of glue on your design on this side with all the pencil lines and turn it gently onto a colored paper.
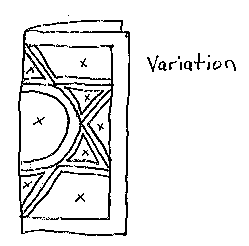 Another Variation:
Fold the paper in half. Make the outside frame on three open sides, not on the fold. Draw half of a shape and half of a symmetrical object.